Category Archives: Teaching

Crossing the River

Crossing the River worksheet

This is a simple game for teaching probability. I remember one of my own teachers using it, and I’ve recreated the game board for my own use. The rules are quite simple:

  • Each student receives 12 tokens, 2 dice and a worksheet.
  • The student places the 12 tokens on any of the 12 spaces on the Start side of the river.
  • The student rolls the dice. They may move one token across the river in the space that matches the dice roll.
  • The object of the game is to move all of the tokens across the river in the least number of rolls.

The students quickly discover that some numbers come up more often than others, and that a pair of dice will never roll 1. For a more advanced lesson, different means of generating numbers could be used: a 12-sided dice, three 4-sided dice, twelve coins, a spinner and so on.

Lesson Plan: Fake Ads

Grade: 7
Subject: Media Literacy
Topic: AdvertisingMaterials: examples of fake ads, fake product worksheets

Introductory Activity: (15-20 min)

Show the students examples of fake ads (image or video) and discuss how they try to sell their product. Eg. appealing word choices, images, celebrity endorsement.

Fake Ad Skits (20 min+1 period)

Divide students into groups of 3-4. Give each group a worksheet with a fictional product. They have the rest of the period to devise a fake ad skit, with written script, to (a) describe what the product is and (b) convince the rest of the class to buy it.

Students then present their ads to the class. (following period.)

Assessment:

  • Script handed in at the end of period 1.
  • Performance of skit:
    • Speaking clearly and confidently /4
    • Making product appealing /4
    • Effort (costumes, props) /4

snake burger

Write a commercial, in the form of a skit, for this product. It should:
1. tell the audience what your product is
2. convince the audience to buy it.

You will act out the skit in front of the class. You will also hand in your script. Make sure all of your group’s names are on the skit.

Comments:

The most difficult part of this lesson was finding examples of fake ads that were school appropriate (many contained profanity). The students enjoyed creating their ads, although some groups had trouble figuring out how to depict their products. Each fake product was a photoshopped image from the Worth1000 website.  The element of humor made the exercise interesting for everyone. This lesson could work well in an advanced ESL class; it could also be adapted to things like fake news reports in order to practice specialized styles of language.

Lesson Plan: Character Guessing Game

Grade: 4
Subject: Drama

Expectations: Students will portray a character using language and gesture.
Materials: character cards (30), rules on chart paper
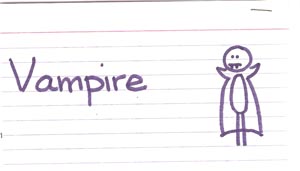
Vampire card

Introduction:

Demonstrate the game by acting out a character (a Bear) and having students guess what it is. Point out how you can give clues with both language and gesture. Go through the rules and hand out character cards.

Directions:

Students each receive a card, face down, with a character type or occupation on it. The rules of the game are as follows:

  1. Do not let anyone else see your card.
  2. When it’s your turn, you can’t say the word that’s on your card.
  3. You can use any other words, body language, accent and so on to give clues about your character.
  4. Other players ask questions and try to guess who you are.

Call for volunteers to go first. In order for everyone to have a turn, allow 2-3 minutes per player.

Concluding activity: Collect cards. Ask students to comment on what methods they used to portray their characters.

Comments:

This class was generally interested in drama and skits, so this lesson worked very well with them. Drama was the last period on Friday afternoon, but all the students stayed interested in the game. Some of the shyer students passed their turn at first, but by the end of the period they were willing to try it. The finale involved the classroom teacher, who had taken the “Ninja” card, acting it out using a large turtleneck sweater. This lesson could easily be adapted for various ages and levels of language ability, and the cards could be used for a range of conversation activities.

Lesson Plan: Nonsense Words

Grade: 5/6
Subject: Language Arts

Expectations: Students will demonstrate that various words (even nonsense words) can be used in the same grammatical structures.
Materials: chart paper, blackboard, mad libs worksheet.

Developmental Strategies:

  • Write the following on the blackboard or chart paper:

“The greedle miks at barmin.
Haddy greedles never mik.
They only shoon wommily.
The lominik pels the greedle.
The greedle pels the zore.
The zore goes to the plinder with the sooly rath.”

  • Questions to the students:
    • what does the greedle do?
    • When do they do it?
    • What kind of greedle shoons?
    • Who pels the greedle?
    • Who did the greedle pel?
    • Where did the zore go? With whom?
  • Point out that you can understand the grammar of a story without knowing what the words mean, and that the grammar can give you clues to the meaning of the words. Questions: what do you think greedless, zores and lominiks are? What do mik and shoon mean? What’s barmin?
  • Students complete Mad Libs worksheet (to be read aloud in the next class).

madlibs worksheet

Comments:

This class needed improvement in reading and writing, so I thought a fun lesson on language structure would do them some good. Their expressions when they saw the example paragraph were priceless, but after I asked the first comprehension question, they got the idea and had a lot of fun. The Mad Libs that they came up with were hilarious (one included the sentence “Barack Obama came out of a coffee shop”). This lesson could easily be adapted into an ESL lesson on understanding words from context.

On Continuing Learning

If I had my fondest wish, I would be a student for the rest of my life. That’s not entirely practical, but even when I’m not in school, I’m inevitably studying or exploring some topic. It might involve international travel, or just sitting down with an episode of Mythbusters; it might be as academic as Japanese writing, or as practical as changing a bicycle tire. Yesterday, I was building a stove out of soda cans; today I am watching a YouTube video on the origins of life. Tomorrow I might be reading a book about Ancient Egypt or soap making or folk music.

Studying these subjects is not just fascinating in its own right. As a teacher, it reminds me of what it feels like to be bewildered, confused, and simply not grasping what has been explained. It reminds me that what’s obvious to the teacher may be far from clear to the student. And when I extend my understanding of the universe around me, I can bring that sense of wonder and curiosity back to my own students.

Flash Cards

flash cards

I designed this series of flash cards while working as an ESL tutor. My student was a visual learner, so these cards helped her with both vocabulary and sentence building. Each card includes the following elements:
– A  title bar whose color indicates whether the word is a noun, verb or adjective.
– An icon on the upper left indicates the vocabulary topic (such as weather or games).
– An image illustrating the word.
– A simple definition or description of the word.
– An example sentence with the vocabulary word highlighted.

So far, this card series includes 56 cards, covering the topics of weather, animals, foods, activities, simple adjectives, and locations. Most of the images are from Google Image Search. The card template is quite versatile, and I could easily expand the series to include more items and topics.

Making Mountains out of Molehills

This essay is responding to the article “Deconstructing Disney in the Elementary Art Classroom”. Read the original article (PDF)

Walt Disney films have often been criticized, both for their conservative values and for bearing less wholesome messages than they advertise. The article “Teaching (Popular) Visual Culture: Deconstructing Disney in the Elementary Art Classroom,” by Kevin M. Tavin and David Anderson (2003), is one such criticism and also argues that criticism of popular film is essential in art classes. Unfortunately, the author’s argument is far from convincing, and is undermined by poor examples and an alarmist tone.
Continue reading

Asking for Directions in Japanese

This PDF is the fourth in a set of 20 lessons in basic Japanese which I put together while tutoring an adult student. I wouldn’t call myself fluent in Japanese, but I understand enough about the language to pass on the basics to someone else. I decided to create my own materials for these lessons because, of the various textbooks available to me, none were what I wanted. Most were either travel phrasebooks or focused on grammar, and I wanted a more comprehensive approach.

Each of the lessons I put together contains the following elements:
– One or two pages giving related vocabulary
– A series of example phrases or dialogue about the topic
– Explanations of one or two grammar concepts, usually related to the topic
– A brief note on a point of usage or polite language
– Descriptions of one or two grammatical particles and their use

This is definitely not a self-study text; there are no practice exercises, and the vocabulary and phrases are presented in kana only, without a romanized version. This is because one of my goals was to teach my student how to read kana in conjunction with learning the rest of the language.

If I ever go back and revise these lessons, one thing I would change is to include a vocabulary list including romanizations and translations for all of the vocabulary in each lesson. I would also like to find a more flexible kana font (the one I used here was difficult to work with), and, of course, have everything checked by a native speaker of Japanese.

Lesson Plan: Geometric Stained Glass

Grade: 4
Subject: Visual Arts/Math
Topic: Transformations

Materials: index cards, large white paper (11×16), pencil, scissors, colored pencils/markers/crayons, ruler

Introduction:

Show the class some pictures of stained glass (modern or historical), and ask them about stained glass they have seen. Point out that it is composed of areas of bright color adjacent to each other. Show the prepared example piece and demonstrate the steps of the activity using a large cardboard cutout shape on the chalkboard.

geometric stained glass

Part 1:

  1. Draw a simple shape on an index card and cut it out.
  2. Fold the large piece of paper in thirds (demonstrate how to do this)
  3. On one section of the white paper, trace the cutout shape several times, without turning it (translation). Make the tracings overlap.
  4. Color in the outlines in various bright colors.

Part 2:

  1. Using the same cardboard shape as for the previous lesson, cover the second section of your paper with tracings that are reflections (turn the shape over).
  2. On the last section of the paper, use tracings that are rotations (turn the shape around a corner).
  3. Color in with bright colors
  4. Color the background a dark color.

Make sure students write their names on both the paper and the cutout.

Comments:

This class had just begun a Math unit on transformational geometry, which I was also teaching. This art lesson is a simple activity that combined the two subjects, and let me show the students that the math they were studying could be used in more ways than just doing homework. The students produced some very nice “stained glass” although there was the expected trouble of lost cutout shapes, students changing their minds about their project halfway through and wanting to start over, and so on. At my associate teacher’s suggestion, I wrote all the instructions on chart paper for the students to refer to as they worked.

Lesson Plan: Symmetry

Grade: 4
Subject: Math
Stream: Transformational Geometry

Expectation: students will identify figures which have a line of symmetry. Students will draw a figure with symmetry.
Textbook: Math Makes Sense 4, p. 247-50
Materials: grid paper, grid chart paper, marker, ruler, paper cutouts, chalkboard

shapes

Introduction: Ask the students to explain the concept of symmetry. (What is symmetry? What is a line of symmetry?). Draw a chart on the board with columns for “No symmetry”, “1 line of symmetry”, “2 or more lines of symmetry”. Have students name common objects that fall in these categories (sketch on board if necessary)

Development: Place various paper cutouts on the board, having 0-4 lines of symmetry. Have the class discuss each one, and have a student come up and draw in the line(s) of symmetry on the cutout. Have the class turn to page 247 in the textbook and do the Explore activity together.

Homework: p. 249-50 # 1-4 (IEP 1, 2a, 3b-c, 4)

Comments:

This lesson is an example of how an idea will strike me at the last moment. My original plan was to discuss Symmetry using only the list of everyday objects and the examples in the textbook. On my way to school in the morning, I had the idea of using cutout paper shapes. I took a few minutes before classes began to cut out shapes with wavy edges. I did this so that the students could more easily see where the lines of symmetry were, but they also seemed to think the cutouts looked cool.